Showing posts with label Tony Moly. Show all posts

Tinted: Tony Moly TONY TINTS

During my college days, it has always been one of my frustrations to own a blush that stays on for an entire 12 hours. My class starts from 7am and ends at 7pm so having a blush that will last that long was a heaven sent to me. But I can't seem to find one.

Luckily, my friend introduced me to cheek stains by Ever Bilena and I found that it lasted pretty much the entire day even if it was hot and humid. And so, from that day on I was on a quest to search for the tints and stains that the market may offer. I've tried several ones and I'm really excited to share these two of my great finds.

They are by a Korean brand, Tony Moly and these are their Tony Tints.


General Over view:
  • Standard plastic tube
  • Has wand and a doe foot applicator
  • The consistency is not too liquidy but not gel-like.
  • A little goes a long way
  • Has to be blended right a way cause it dries pretty fast
  • You might want to dilute it water because it's really pigmented.
  • Lasts a really long time on the cheeks and really stains
  • It has a scent that is actually tolerable, well at least I can tolerate it.
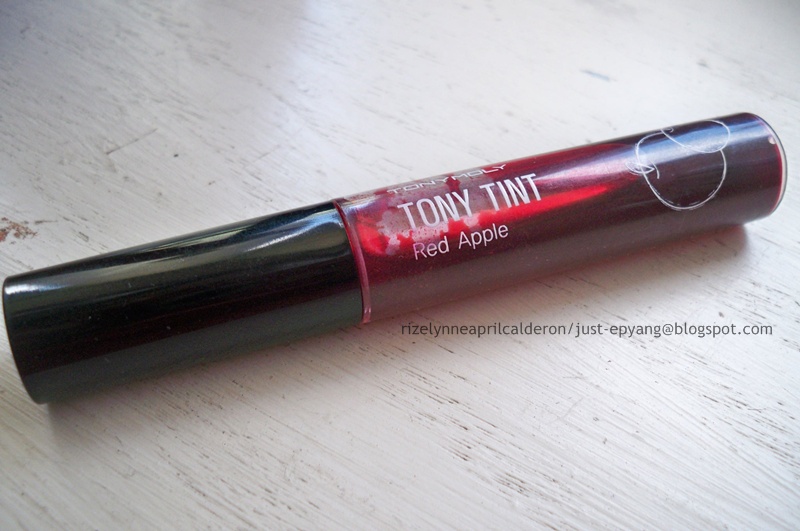

Red Apple is the first that I got. This one is really red, as in bloody red. I suggest that if you're going to use this, you might want to dilute it with water coz this may turn your cheeks crazy red like you've just been slapped so hard. If I am going for a red lip look, I actually use this to stain my lips and then I apply my red lipstick on. You may also use this alone because it's just amazingly pigmented.

This how the wand looks like. As you can see, it's insanely red for a tint.
(L) swiped swatch; (R) Blended out. Can you see the pigmentation?


I really enjoyed Red Apple so much that's why I decided to pick the other shade which is Cherry Pink. If you swatch Cherry Pink, it may show off to be a little to dark to be called 'pink' and to me it almost looked like deep magenta. But if you blend it, the pinkness of it comes out and it will give you that natural flush to your cheeks like it came from with in.

The applicator
See how it doesn't show as pink when swatched and how it is pink when blended out?
If you are a tint junkie like I am, you can get these at any Tony Moly branch on SM malls. They are 198php.

So I guess that will be all for these tints. I will update this post and add some pictures of me wearing them so that you will be able to see how they actually look like when worn.

Thank you so much for reading, talk to you soon! Bye :)

What you'll need: 'No Makeup' Makeup Look

 I'm a fan of the 'No Makeup' makeup look and I prefer to wear this everyday. It's very light, unnoticeable yet you will still look polished and made up. Since I'm a fan of this look very much, I'm going to share to you the things that I use to achieve that look. By the way, this is not a tutorial. This is just merely sharing the things that I use and I really hope you'll find this helpful.

Let's begin.

BB creams (Skin Food, Etude House and Tony Moly)

  • Base
    • I use BB cream for my face. It has the benefits of a moisturizer, but some BB cream provides the coverage of a light foundation. And sometimes, they also have an SPF that ranges from 30-45 depending on what the BB cream is. I'm not telling you guys that you should use BB cream because there are other choices like light coverage foundation if you feel like you need that extra coverage but you don't want it to look heavy; And there's regular or tinted moisturizer if you want to go all natural and if you feel like your skin is in total good condition. I just prefer BB creams simply because it moisturizes, it provide a faint coverage and it has SPF.
Moisturizers (Physician's Formula tinted moisturizer and Celeteque)

In2it Eyebrow Powder


  • Brows
    •  For my brows, I use brow powder simply because I have thick brows and all I need to do is to define them. But if you have thin brows, you might want to use pencil for a precise definition. And for me, it looks more natural if I use powder on my brows.
Avon Glimmersticks Eyeliner in Cosmic Brown

  • Eyes
    • After I define my brows, I define my eyes using a brown eyeliner by tight lining. Tight lining basically is lining the lash line and inner rims of the eyes. I choose brown because black can be a bit too harsh and I want a subtle definition too.
Fanny Serrano Eyelash curler
  •  Eyes
    • And then I will use an eyelash curler to open up my eyes.
Maybelline Full 'N Soft mascara
  •  Eyes
    • After curling my lashes, I will be defining them using a mascara. Maybelline's Full 'N Soft mascara is perfect to be used in this look because you won't get that brittle effect that most mascara may give you. This particular mascara gives a natural and full look. Hence the name, Full 'N Soft.
Lip and Cheek tints. (Tony Moly, Nature Republic and Etude House)
  •  Cheeks
    • For the cheeks, I use tints because it looks more natural and it looks like your blush came from with in, but sometimes I also use powder blushes I just pick a shade that leans on the peach side. 
Sleek and Nichido powder blush
Lip balms (Etude House and Tony Moly)
  •  Lips
    • Lastly, I just put on tinted lip balms or sometimes the regular lip balms to moisturize my lips. But I have to say, I wear tinted lip balms more often than regular ones because I want that slight hint of color onto my lips. 
So, that's all that I need to have to achieve the popular 'No Makeup' Makeup Look that has been so popular now a days.  If you are wondering why I didn't include any concealer it's because I don't want to conceal my uber dark circles. I just want to enhance my skin and let my skin peek through. (naks!)

Well, that will be all and I hope you had fun reading this post and I also hope you found it helpful.

Thanks for reading. Bye!